Part 6: Controlling Lights via Raspberry Pi
This is the sixth in a series of blog posts about researching and rewiring Christmas lights to work with Arduino devices.
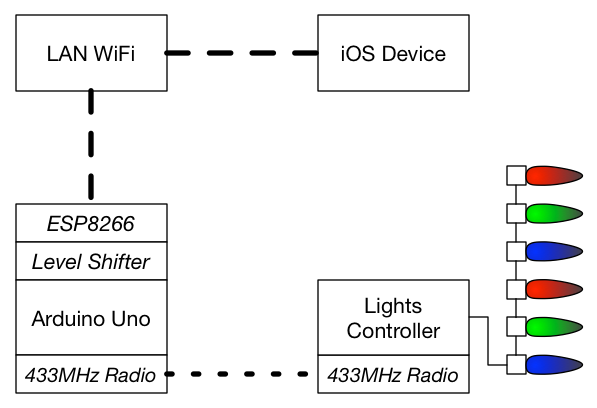
I know this series of posts have been talking about Arduino devices. But I have been thinking about how to best remotely control the Home Collection RF lights and setting up an Arduino with both the RF transmitter and WiFi seems to be more work than I actually need to do.

But what about a Raspberry Pi instead? I am already using one as a mini home server, and it has GPIO pins with both 5V and 3.3V. Can I connect the 433MHz transceiver to it and control the lights from Raspbian?
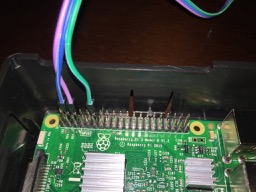
I connected the transmitter to the Pi as follows:
| RF Transmitter | Pi |
|---|---|
| GND | Pin 6 |
| VCC | Pin 4 |
| DATA | Pin 12 |
Next I booted up the Pi and set up a Ruby script to test the radio.
$ sudo apt-get install ruby ruby-dev
$ mkdir pi-lights-control
$ cd pi-lights-control
$ sudo gem install bundler --no-rdoc --no-ri
$ vim Gemfile
source 'https://rubygems.org'

gem 'rpi_gpio', '~> 0.3.2'
$ bundle install
$ vim control.rb
#!/usr/bin/env ruby -w

require 'rpi_gpio'

RPi::GPIO.set_numbering :board
RADIO_PIN = 12
RPi::GPIO.setup RADIO_PIN, as: :output
TIME_DELAY = 120
CODE_TABLE = [
  [4,4],
  [4,8],
  [4,71],
  [26,12]
]

powerOn = [3,0,1,0,1,1,0,0,1,1,1,0,1,0,0,0,0,2]
powerOff = [3,0,1,0,1,1,0,0,1,1,1,0,1,0,0,0,1,2]

def set_high
  RPi::GPIO.set_high RADIO_PIN
end

def set_low
  RPi::GPIO.set_low RADIO_PIN
end

def transmit_signal(pattern)
  6.times do
    pattern.each do |code|
      high_length = CODE_TABLE[code][0]
      low_length = CODE_TABLE[code][1]

      set_high
      sleep(high_length * TIME_DELAY / 1000000.0)

      set_low
      sleep(low_length * TIME_DELAY / 1000000.0)
    end
  end
end

puts "Turning Lights ON"
transmit_signal(powerOn)

puts "Waiting 5 seconds"
sleep(5)

puts "Turning Lights OFF"
transmit_signal(powerOff)

at_exit do
  RPi::GPIO.clean_up
end
This script is more or less a Ruby port of the C code I wrote in Part 4. Running it via the command line, I see the lights turn on, and after five seconds the lights turn off. Excellent!
Even with the lights outdoors, the range from the Raspberry Pi is about 10 – 15 metres and works fine. If I need better transmission or range the modules have a hole for an antenna.
Next I expanded the Ruby script into a gem/library where code tables and so on are in their own classes. By turning it into a gem, I can then control the lights either using a command line interface or integrate it with other Ruby frameworks such as Sinatra or Rails.
Get 433.920 MHz radio boards for ArduinoTest HC lights remote with Arduino and radio receiver to determine signals for controlling HC lightsUse Arduino and radio transmitter to simulate the remote and control the lightsConnect Arduino to WiFi or Bluetooth and setup remote control from iOS or from a Raspberry PiFind a housing for the Arduino — it is wireless so it doesn’t need to go outdoors but it will need powerTest range of the remote, then the range of the RF transmitterGet antenna if necessary- Set up lights outdoors, then control them from indoors!
The next step I want to tackle is creating a tiny web server to remotely control the lights on my home network — a simple web page that can issue the commands. Afterwards I will try to integrate it with homebridge and control the lights via Siri.
